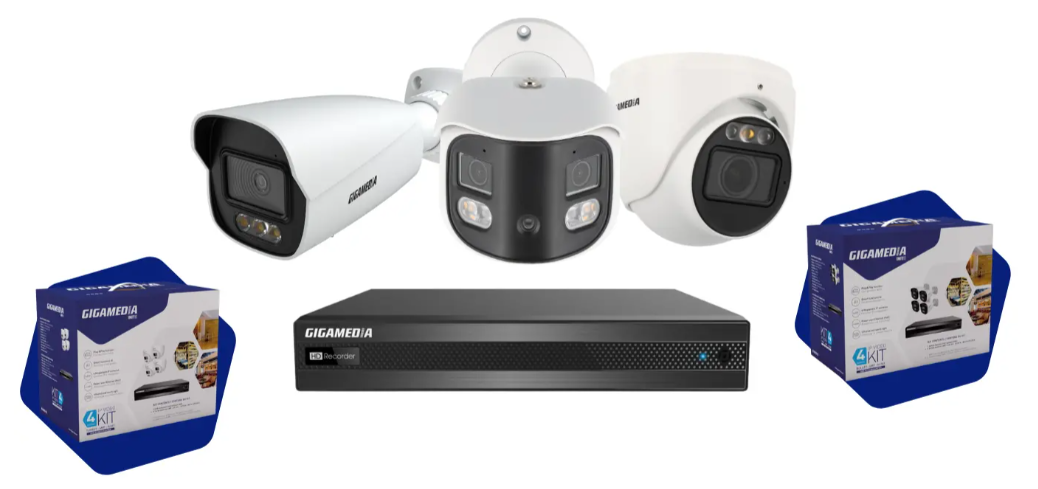
Valid for the following references:
- GGM NVA321604MR
- GGM NVA320002MR
- GGM NVA320004MR
- GGM NVA160002R
- GGM NVA161602R
- GGM NVP2560016MR
- GGM NVP1280016MR
- GGM NVP640016MR
- GGM NVS160001D
- GGM NVS080801D
- GGM NVS040401D
- GGM NVI080801D
- GGM NVI040401D
Here are the steps in the startup wizard for a first use of this video protection kit:
1. Connecting to the Monitor: Plug a display (HDMI or VGA) directly into the back of the recorder to access the interface.
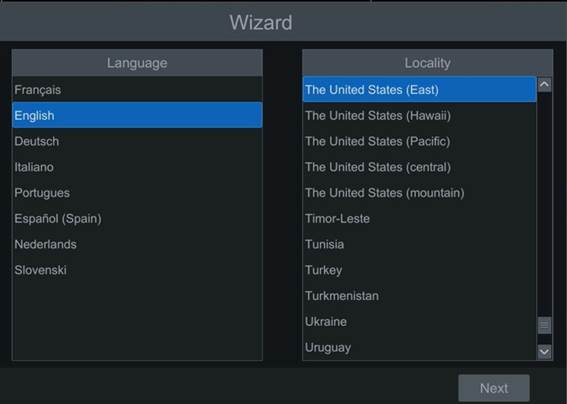
2. Language Choice:- Select the interface language.
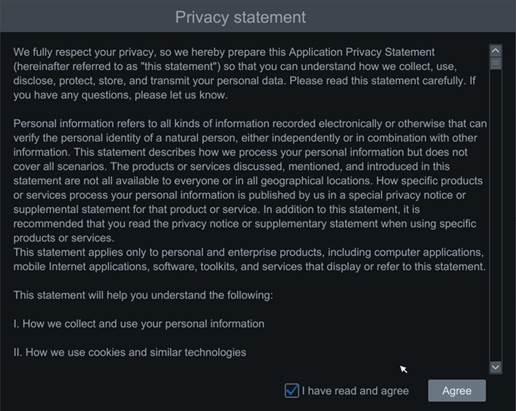
3. Privacy Statement:- Read and accept the statement to take the next step.
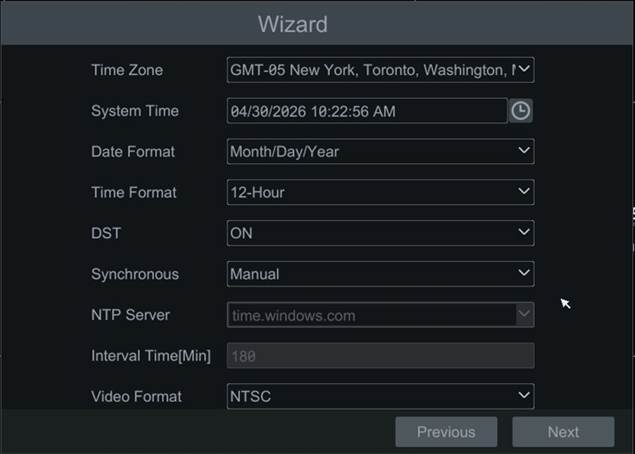
4. Date and Time Setting:- Set the system date and time according to your time zone.
- DST stands for the activation of daylight saving time.
- Ability to sync with an online time server
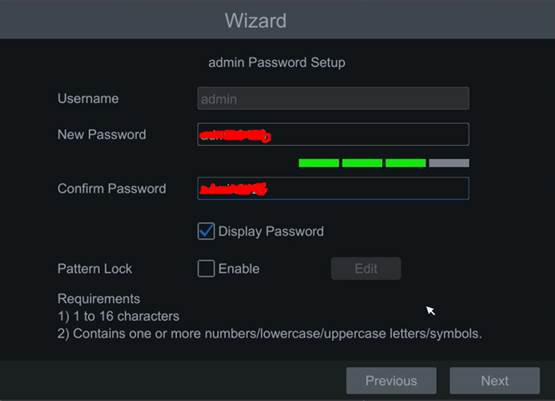
5. Setting the Recorder Password:
- When starting for the first time, you need to set a password that is linked to the admin (administrator) account. Strong password with minimum number, letter and special character.
- Ability to use a Pattern Lock
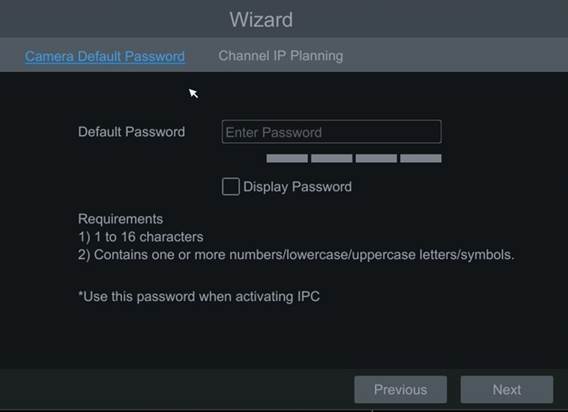
6. Setting the Camera Password:
This next step allows you to set a password for the cameras directly.
Possibility to leave the default camera password.
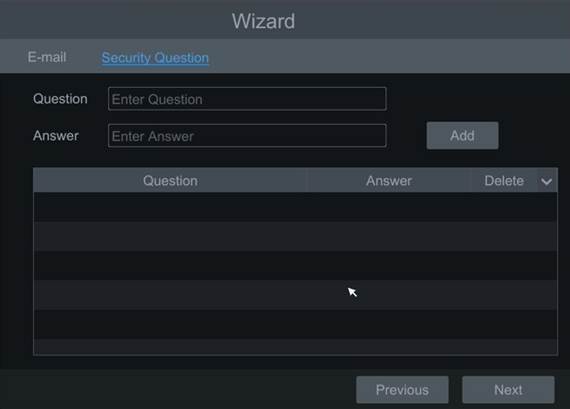
7. Password Recovery Method (If Forgot Password):
- Email: Set an email address to receive a verification code for password reset.
- Security question: Possibility to set up to 3 security questions to find the password (optional)

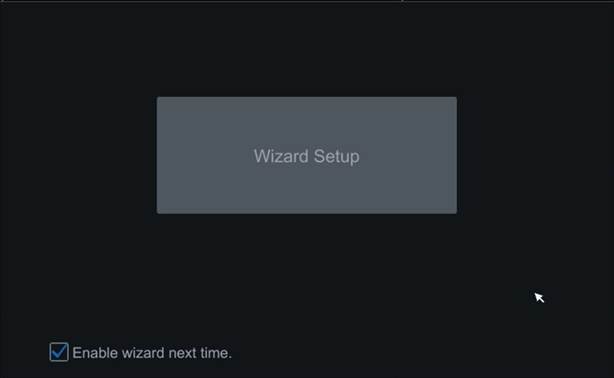
The system reboots and initializes.


Wizard Setup :
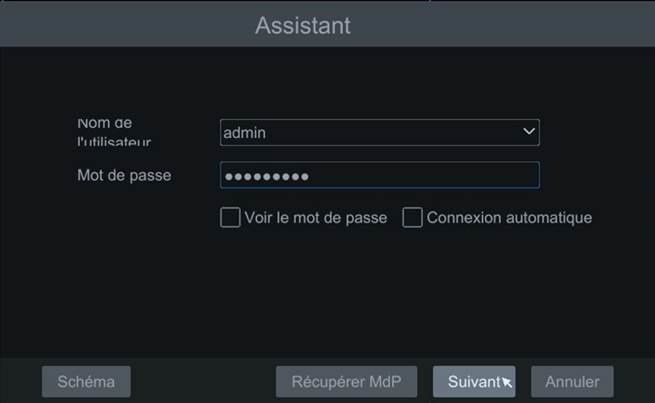
A. Login:
- Enter the password linked to the admin account
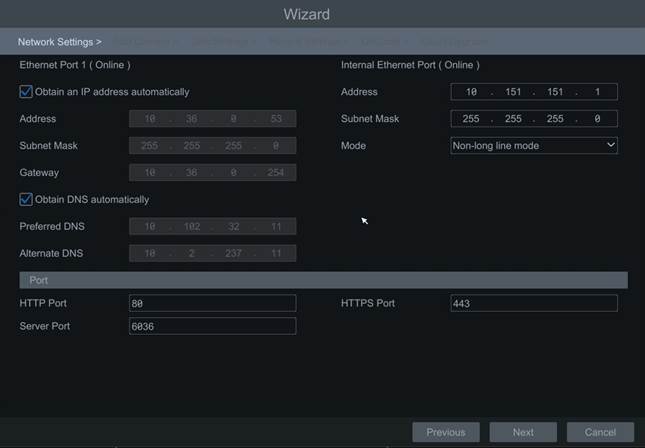
B. Network settings:
- Depending on your network configuration, you have the option of obtaining an IP address automatically or manually.
Example: Internet box connected to Ethernet port 1 of the -> IP auto recorder (DHCP)
- Internal Ethernet port (dedicated exclusively to the camera network)
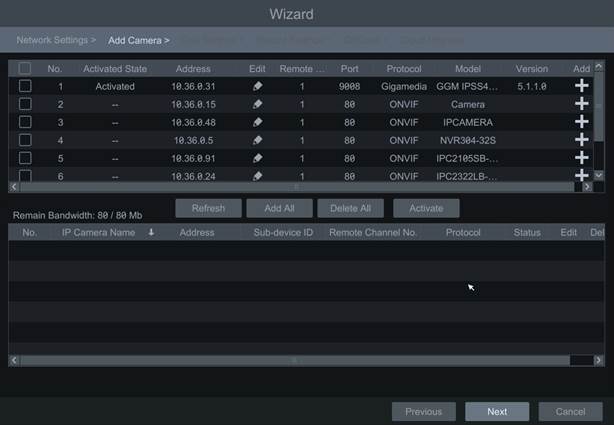
C. Adding Cameras:
- Your cameras connected directly to the back of your recorder are added automatically.
- Ability to detect and add cameras manually across your existing network.
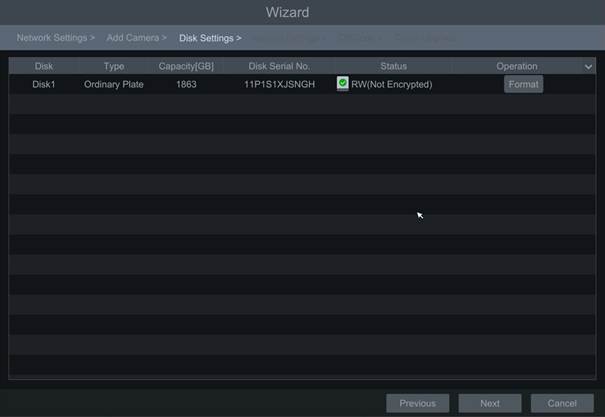
D. Hard Drive Configuration:
In this step, the hard drive should be detected and operational. Check the status: R/W (Reader/Write) by default.
If not, proceed to format the disk. If not, move on to the next step.
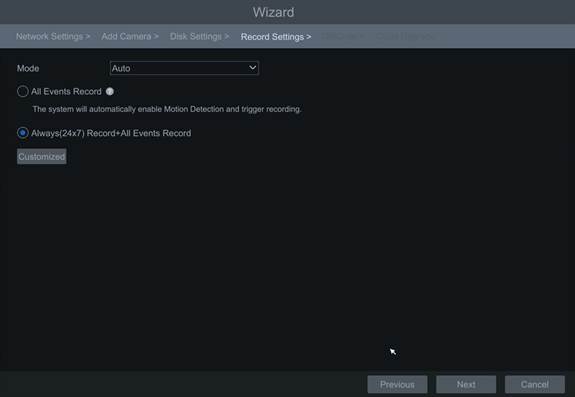
E. Set recording mode:
Ability to record on events or to record continuously (24 hours a day) and automatic overwriting of the oldest recordings.
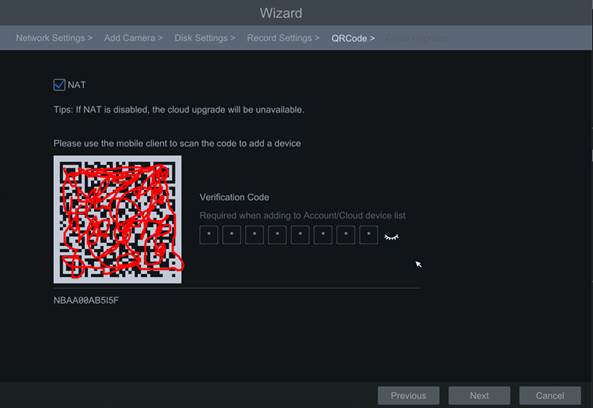
F. Enable Remote Access :
Activate the NAT to be able to achieve remote access with your QR Code.
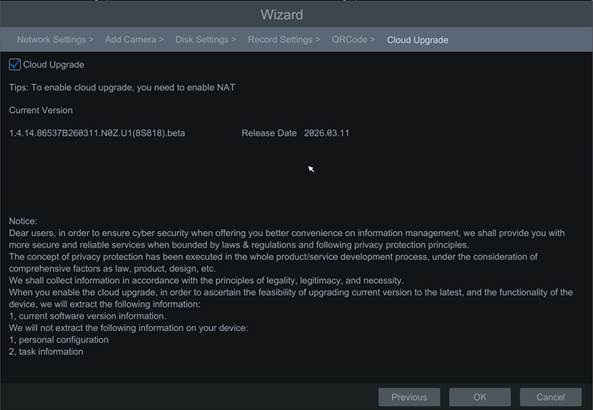
G. Update via Cloud :
Select this checkbox to receive the latest updates for your product.
Your recorder is now up and running
Was this article helpful?
That’s Great!
Thank you for your feedback
Sorry! We couldn't be helpful
Thank you for your feedback
Feedback sent
We appreciate your effort and will try to fix the article