Valid for those references :
- GGM GS20016G2S
- GGM GS20024G2S
- GGM GS20024P2S
- GGM GS20048G4S
- GGM GS20048P4S
- GGM GS2008G2S
- GGM GS2008P2S
A virtual LAN, commonly known as a VLAN, is an independent logical computer network.
Managed switches allow you to set up multiple VLANs on a single switch to efficiently separate the different cohabiting flows on IP networks. VLANs also allow you to group different devices even if they are not directly connected to the same switch.
For example, a VLAN can be used to separate traffic within a company based on users or user groups and their roles (e.g., marketing department and video surveillance network)
Example with 2 switches:
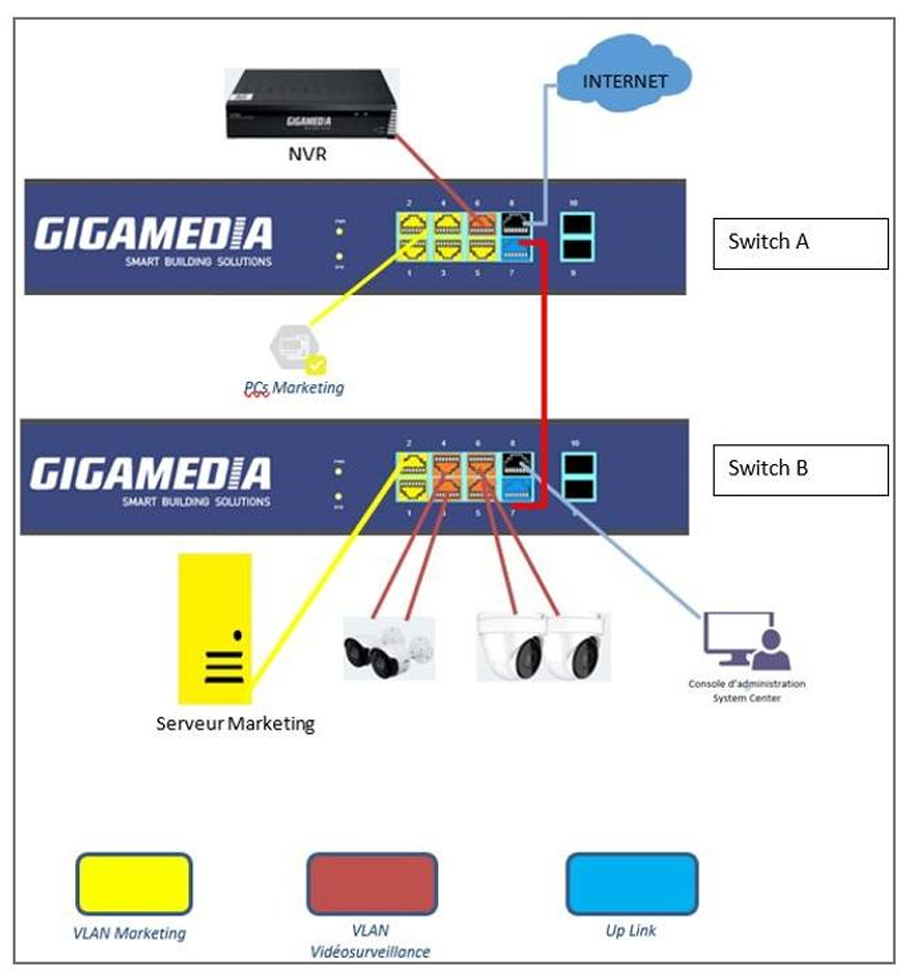
• PCs in the Marketing department may have access to the Marketing Server
• The Marketing department is isolated and cannot have access to the CCTV
network
• The Video Recorder (NVR) will have access to IP cameras only.
• The PCs of the Marketing department, the Marketing server and the NVR will have
Internet access.
• IP cameras do not have access to the Internet.
We will create 3 VLANs:
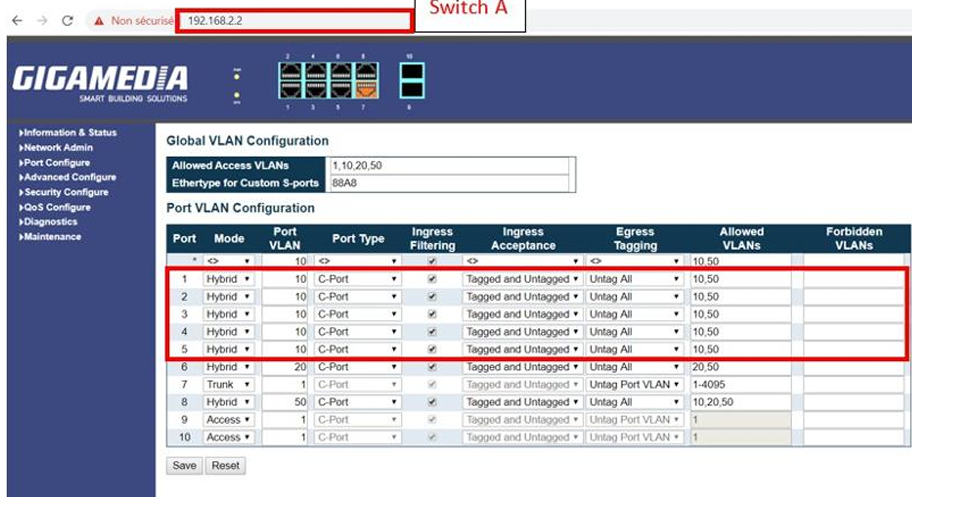
• VLAN 10 for VLAN Marketing.
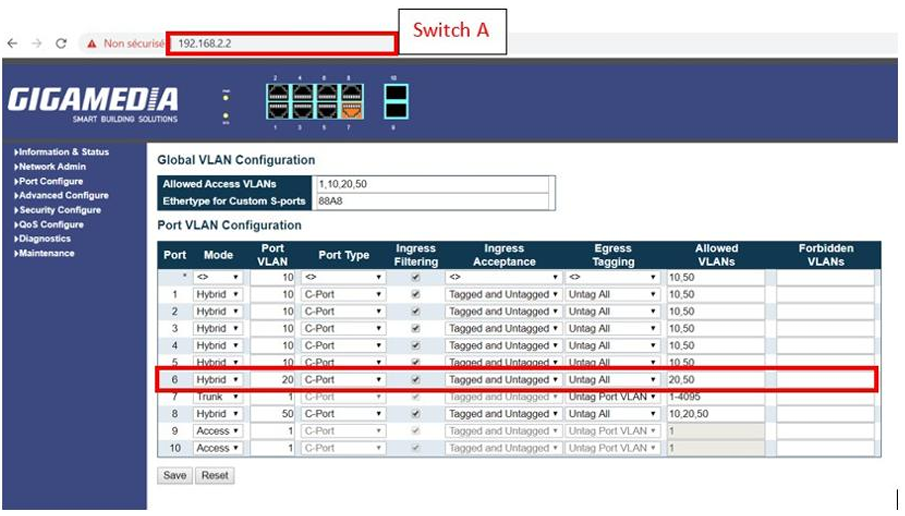
• VLAN 20 for VLAN Video Surveillance.
• VLAN 50 for the Internet VLAN.
By default, VLAN 1 is reserved for system administration.
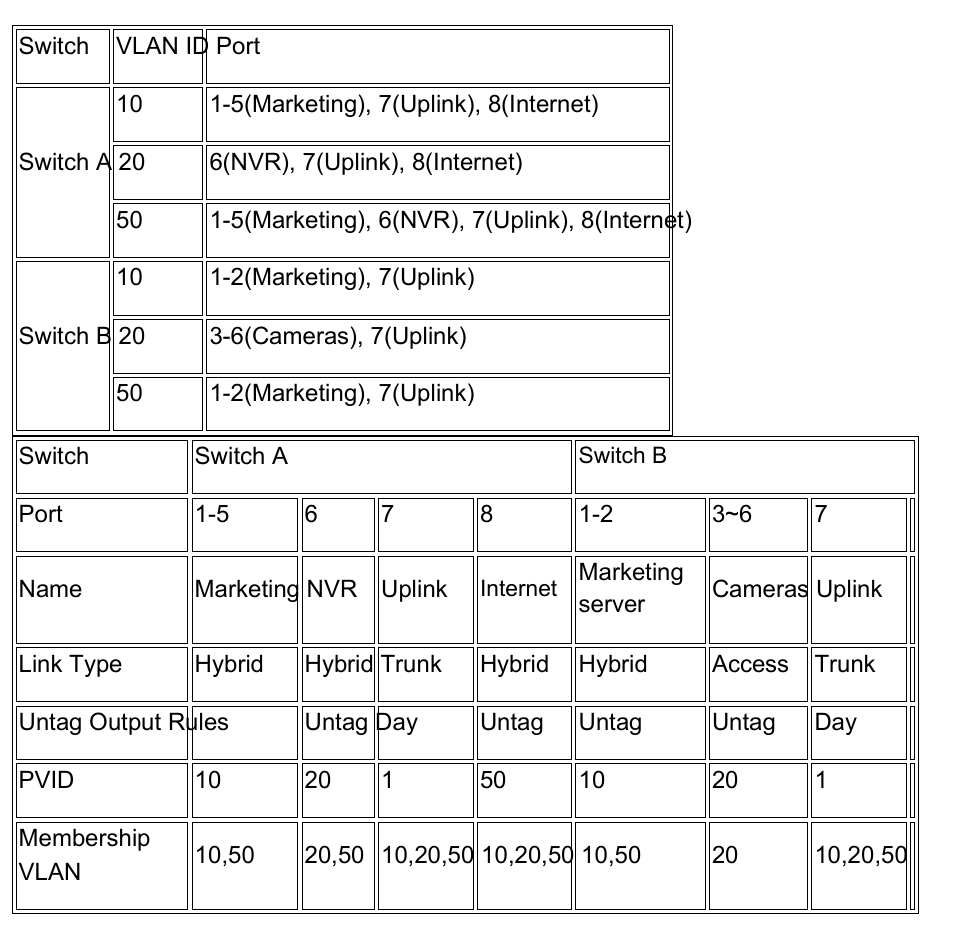
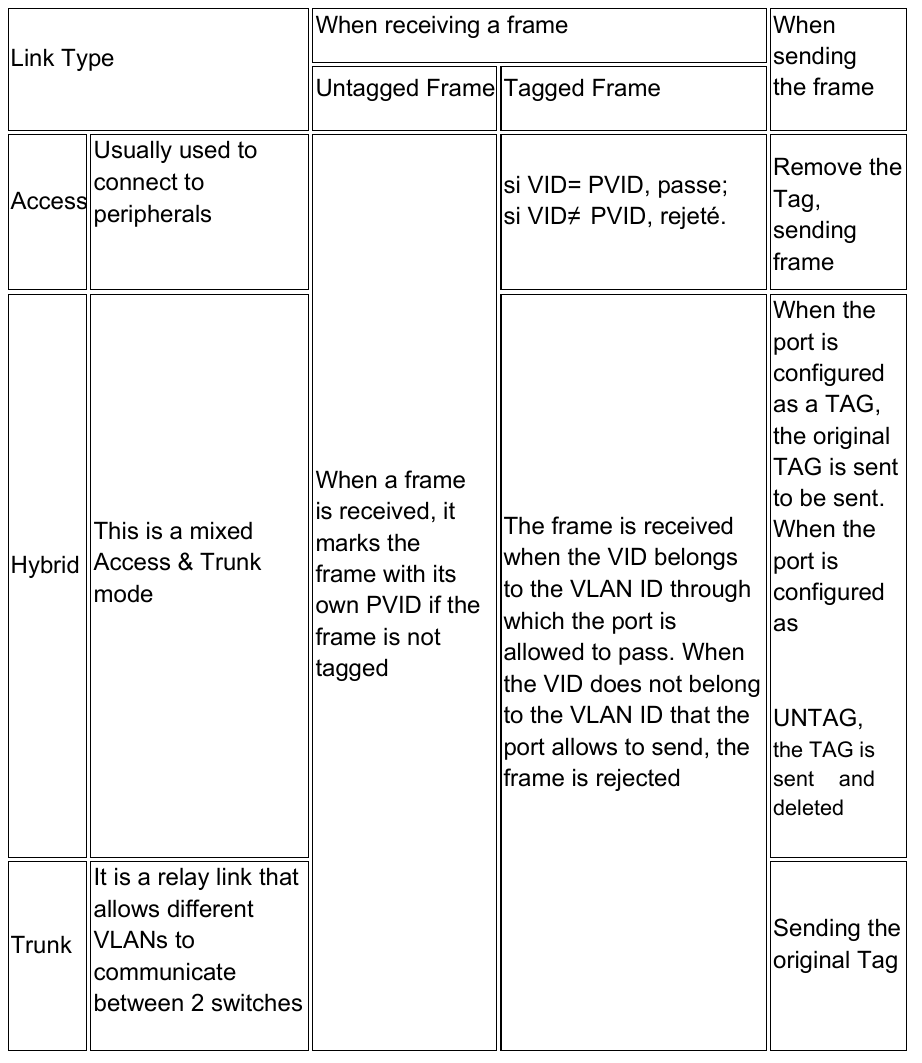
• Access: The port can only be partitioned on a single VLAN and the port exit rule is obligatorily
Untag.
• Trunk: The port can be split into multiple VLANs and can receive and send messages from multiple VLANs. The port exit rule is mandatory Tag.
• Hybrid: This port can be partitioned into multiple VLANs and can receive and send messages from multiple VLANs. The port's egress rules can be flexibly configured as Tagged or Untagged
• PVID (Port VLAN ID) is the default VID of the port. When the switch receives a non-VLAN-labeled frame, it adds a VLAN tag to the frame based on the PVID if its port is received and transmitting the frames.
Configuration :
Before you begin, please review the previous articles if necessary:
- GGM GS2008P2S - How do I display the web interface?
- GGM GS20048P4S - How do I change the IP address?
- What is the default password for the GGM GS200xx Switches?
- How do I reset my GGM GS200xx switch?
Step 1: Change the IP address of the Switches.
Connect your PC's port to Port 8 of the Switches.
Use your Internet browser such as Google Chrome or Firefox, to reach the Switch
A administration page
- IP: 192.168.2.2
- Switch B - IP: 192.168.2.1
- The default identifiers are admin / system
Then, go to the left column Advanced Configuration then VLAN for VLAN management (VLAN ID1 is the default VLAN)
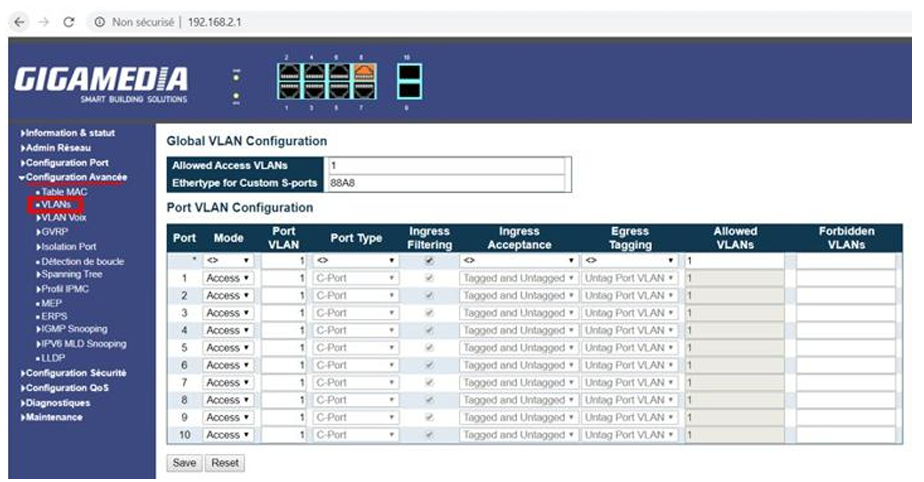
Step 2: Create VLANs for Switch A
Add the ID of each VLAN you want to create: 1 (default), 10 for the marketing VLAN, 20 for the video surveillance VLAN, 50 for the INTERNET VLAN
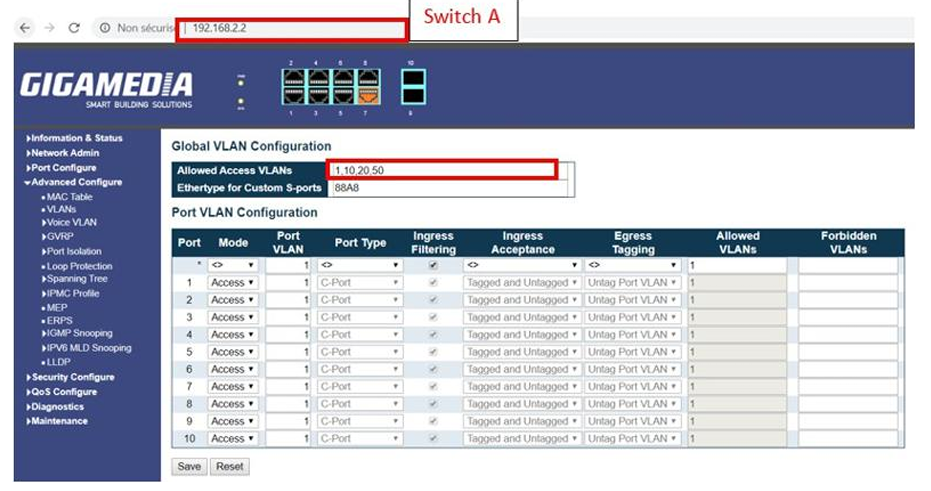
Configure VLAN 10 for the Marketing VLAN as below:
Configure VLAN 20 for the Video Surveillance VLAN as below:
Configure Port 7 for Uplink and VLAN 50 for Internet VLAN as below: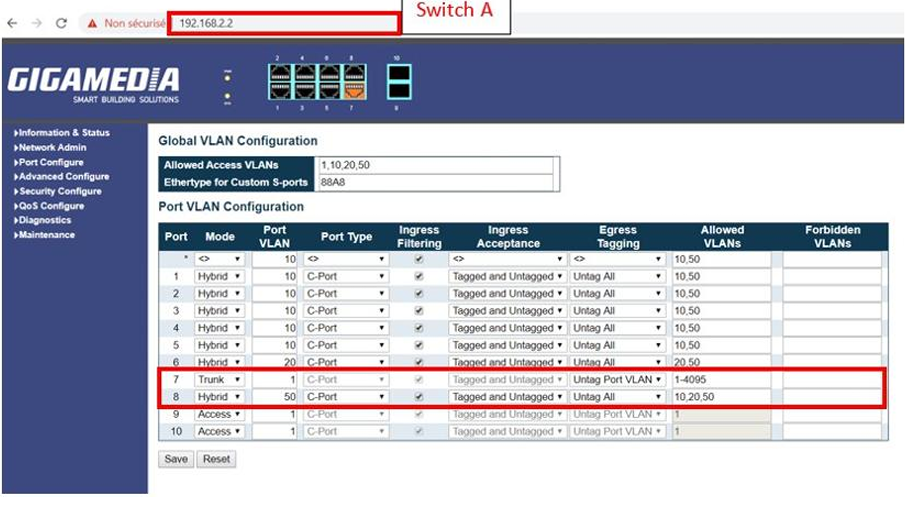
Save
Step 3: Creating VLANs for Switch B
Add the ID of each VLAN you want to create: 1 (default), 10 for the marketing VLAN, 20 for the video surveillance VLAN, 50 for the INTERNET VLAN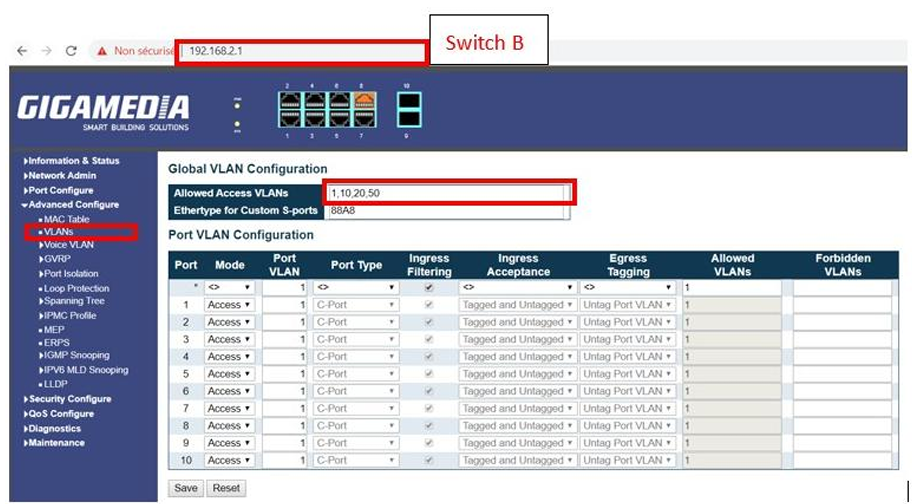
Configure VLAN 10 for the Marketing VLAN as below:
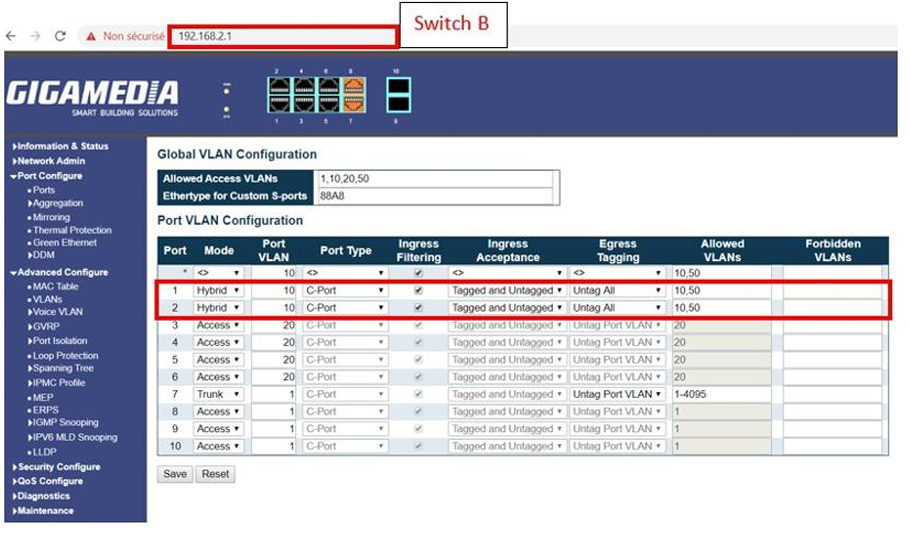
Configure VLAN 20 for Video Surveillance VLAN as below: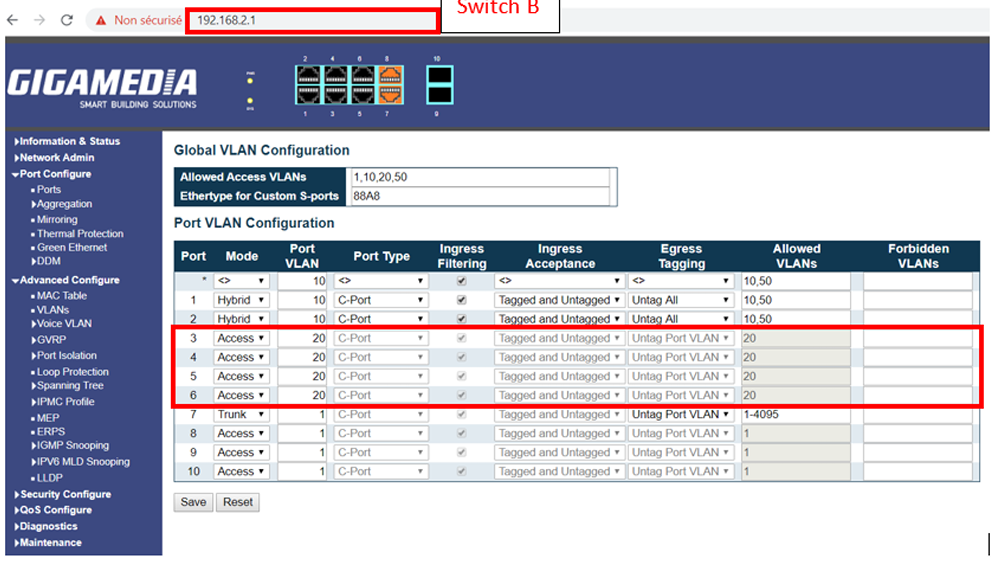
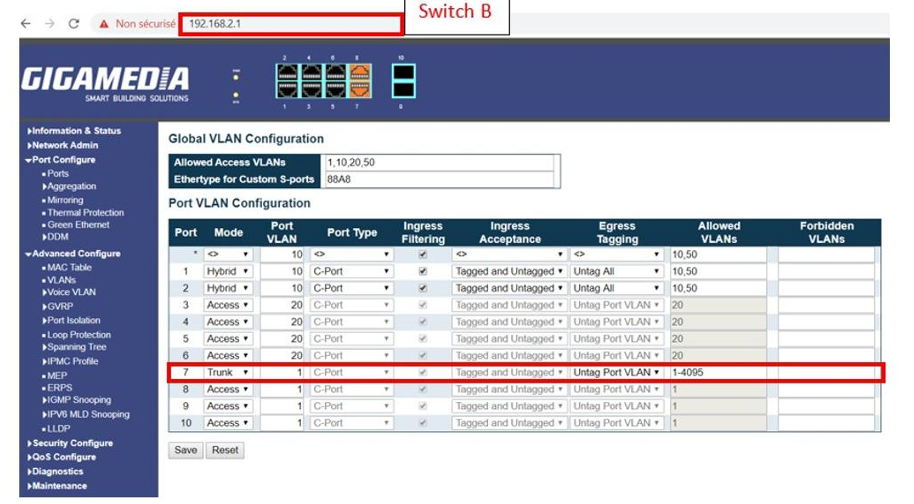
Configure Port 7 for the Uplink as below:
Note: We keep port 8 (default VLAN1) for switch administration.
Save
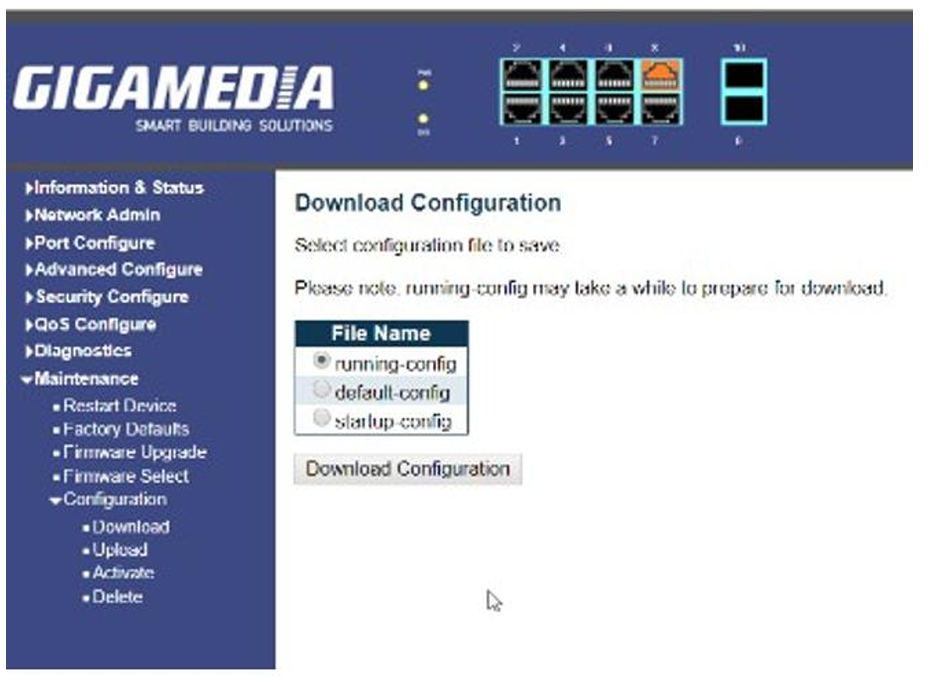
Once the configuration is complete and backed up, you can save the current configuration to a backup file.
In Maintenance / Configuration / Download
Then choose Running-config and click on the Download configuration button
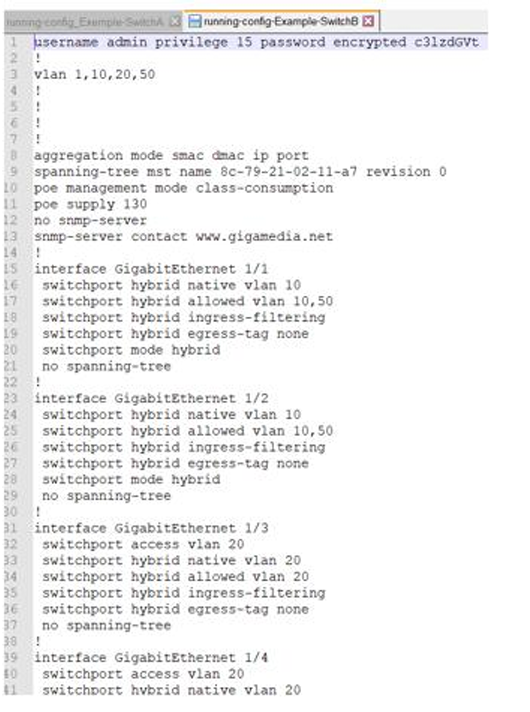
Extract from the running-config file
Was dit artikel nuttig?
Dat is fantastisch!
Hartelijk dank voor uw beoordeling
Sorry dat we u niet konden helpen
Hartelijk dank voor uw beoordeling
Feedback verzonden
We stellen uw moeite op prijs en zullen proberen het artikel te verbeteren